 |
|
|
|
Site Navigation
Projects & Information
»General Information»Wind turbine Projects »The F&P Smartdrive »Electronic projects »Microcontroller projects »Miscellaneous Kits & Parts
»Basicly Natural Pty Ltd»PVC & Aluminium blades »Scale model farm windmills »Price Watch Discussion Forums
Handy Links
»Wind»Solar »Electric Vehicles »Electronics »Micro Controllers »General Interrest About TheBackShed Getting Started Privacy Policy |
The following is a summary of other modifications made to these windmills by one of our forum members. In Kevin's words... Don’t know if many are interested, but after the good advise on quieting the Chinese wind mill I thought I’d forward the improvements my brother and I have done to our 2, 200w 24V mills supplied by Jaycar, $450 each. A bit of history. First day, either we blew up the controller
OR it did not work out of the box. Old alternators are cheap, available
in the bush and easy to check – just do a diode
check in each direction on each diode to see if they
only pass in one direction. We don’t have a dump load on our mills, since our battery bank is so big the maximum input of mill ONE of 10 to 12 amps is only a trickle feed. It’s an effort to get the batteries to float. Battery bank - 2 old fork truck batteries 36 V 800 Ah, cut and spliced to form 2 24V banks. These battery packs were dead when we got them for $50 each six years ago. Find and jump out the dead cells (usually only 1 or 2 cells) instant deep cycle BIG battery bank. Power monitoring is performed via a
PL20 regulator using an external shunt resistor 1 month ago we bought another wind mill. We took more time with the assembly this time, found the blade mount holes were way out of align, quite a bit of filing to get the blades to sit flush to the hub and properly spaced. At this point we super glued 1.5 dia wiper snipper cord down the back of the blade as suggested by the forum. Rewired, the system for the 2 mills, another car alternator (did not even take its own controller out of the box) Well apples aren’t oranges, same
goes for wind mills. Mill TWO produces more power in high winds than Mill ONE however the old mill starts producing earlier and is better in light winds. We suspect that one is in delta and the other is in star. This is becoming a book, not a quick note to the forum. Things can be expanded later if people want to read the ranting of a mad power generator. THE MODIFICATION The basic geometry of the tail is wrong, in moderate winds the thrust on the blades allow the mill to turn slightly away from the wind (as if starting to furl) The tail is not holding the mill into
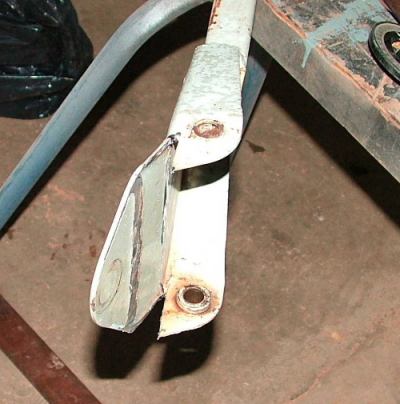
the wind. Mod 1. - Bend the tail arm 10 degrees away from the axis of the wind mill. While mill ONE was down we checked the
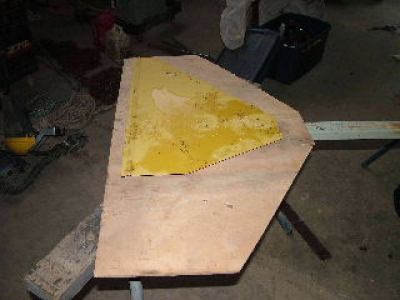
geometry. Mod 2. – Added %50 more weight to the tail. Changed metal tail for a piece of ply wood twice the area and heavier. (at present we are only 0.5 kg heavier than the original vane but could do with more weight) RESULTS, mill ONE is more stable in moderate winds and is holding a higher output in gusty winds during furling operations.
Checking the tail angle.
You can see how Dave (my brother) cut the tail arm to get the added 10 degrees. Just weld a filler in the slot and a splash of paint if you are so inclined. The tail size
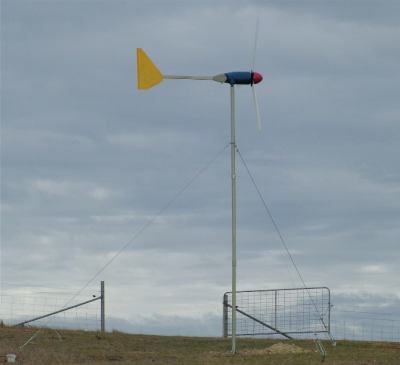
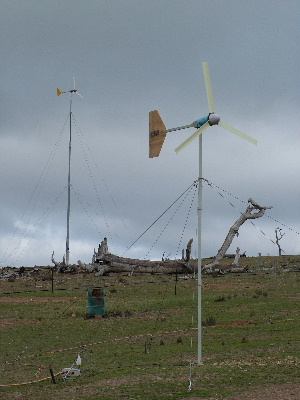
The tail was cut from some scrap ply in the shed. I think it was 7mm thick Pic of the 2 mills, mill
ONE is in the fore ground. Thanks to Kevin ( KTee )
|
||
