|
Forum Index : Microcontroller and PC projects : PC3x - a modular Pico Computer 3 work-alike
| Author | Message | ||||
| Mixtel90 Guru Joined: 05/10/2019 Location: United KingdomPosts: 9136 |
At last... There are quite a few changes since the version originally posted on the other thread so I've created a new one. PC3x 1.1 Construction pack.zip Not available ready built, this is a DIY project. I've kept most of the bits as through-hole for those of a nervous disposition. At the moment I only have the 1.0 version using the Pimoroni module but I've now had it running MMBasic fine in all display resolutions. It configures using OPTION RESET PICO COMPUTER 3 as you'd expect and I've no reason to think that it won't run other firmware for that platform. Price-wise it's not unreasonable for a one-off. You have a choice of using either of the Pimoroni PGA2350 or the Waveshare CORE 2350B modules. If you choose the Pimoroni path you could get the RM2 and the Adafruit DVI breakout module at the same time to save on postage. Almost everything else barring the PCB and enclosure can be found on AliExpress. Some differences: There is no brownout protection chip. There are no indicator lights for the USB sockets. USB current protection is crude but effective, using a self-resetting fuse. The power button is bigger and you can get it in many colours. ;) Have fun. :) Mick Zilog Inside! nascom.info for Nascom & Gemini |
||||
| Mixtel90 Guru Joined: 05/10/2019 Location: United KingdomPosts: 9136 |
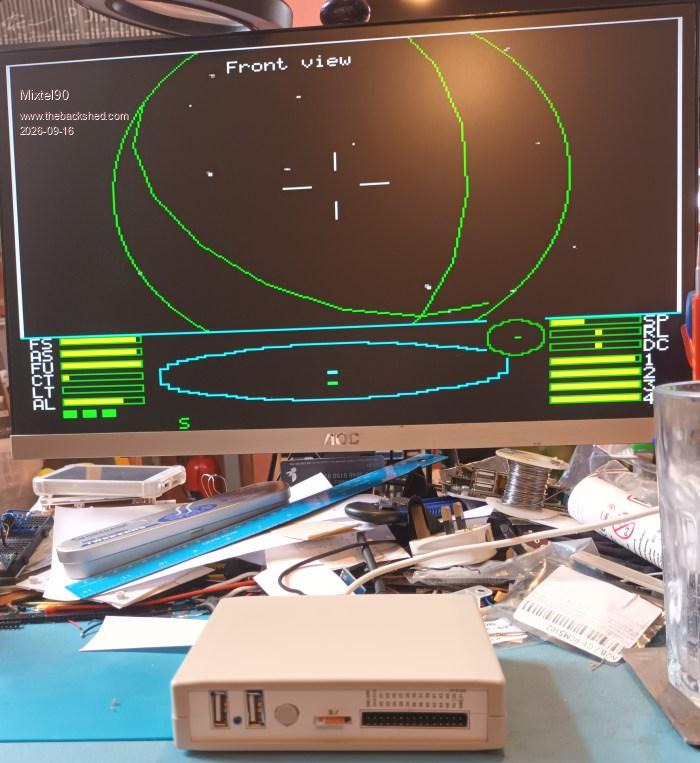
Yes, my prototype (with cardboard front and back panels) will run Elite just fine. :) ![]() . Edited 2026-09-16 01:49 by Mixtel90 Mick Zilog Inside! nascom.info for Nascom & Gemini |
||||
| Volhout Guru Joined: 05/03/2018 Location: NetherlandsPosts: 6118 |
Nice Mick !!! If you hadn't told me I would not have guessed it was cardboard front. Volhout PicomiteVGA PETSCII ROBOTS |
||||
| Mixtel90 Guru Joined: 05/10/2019 Location: United KingdomPosts: 9136 |
I'm hoping to eventually learn how to 3D print the panels for my prototypes. Not the RM2015 boxes though, the mini printer that I've only just got only has a bed size of 120mm x 120mm. It's so new (to me - it's second or third hand) that I've yet to do my first print of any sort, never mind create a STL file for anything. :) Give it time - it only arrived yesterday. :) I did the cardboard panels to test the drawings that I included in the manual - and they are very close. Possible improvements: Open up the power button hole by about 1mm. Move the micro SD card slot about 1mm to the left. I need to investigate how the second error has happened. I have a feeling that my block of the module might be inaccurate. The button hole is simply a case of not allowing enough clearance, I think. Mick Zilog Inside! nascom.info for Nascom & Gemini |
||||
| The Back Shed's forum code is written, and hosted, in Australia. | © JAQ Software 2026 |